
As an online store owner, you know that it’s essential to find ways to stand out from the crowd and engage with your customers. One powerful tool that can help you achieve this is Facebook Messenger automation.
Why Facebook Messenger Automation
Facebook Messenger automation allows you to be available to your customers 24/7. This is a significant advantage over traditional customer service channels, as Messenger is always accessible, meaning you can respond to customer queries and concerns quickly and efficiently.
By using a chatbot, you can provide customers with instant responses to their queries, while also helping them find the products they’re looking for. This improves both your customer service and users’ shopping experience.
Personalisation is another essential aspect of Facebook Messenger automation. With customer data and preferences, you can tailor your responses to meet your customers’ needs and provide them with a more personalised experience. This can help you stand out from your competitors and create a strong brand identity.
Finally, Facebook Messenger automation can help to increase sales by streamlining the checkout process. Chatbots can guide customers throughout the purchasing flow, which potentially assist in achieving a higher conversion rate and ultimately increase your revenue.
So if you’re eager to implement Facebook Messenger automation and want to set up instant replies for your online store but aren’t sure how to get started, Shopboxo is here to assist. Keep reading for a comprehensive step-by-step guide on configuring instant replies using Facebook Messenger automation on your e-commerce site.
Build your online store today with Shopboxo.
Facebook Messenger Automation Set Up
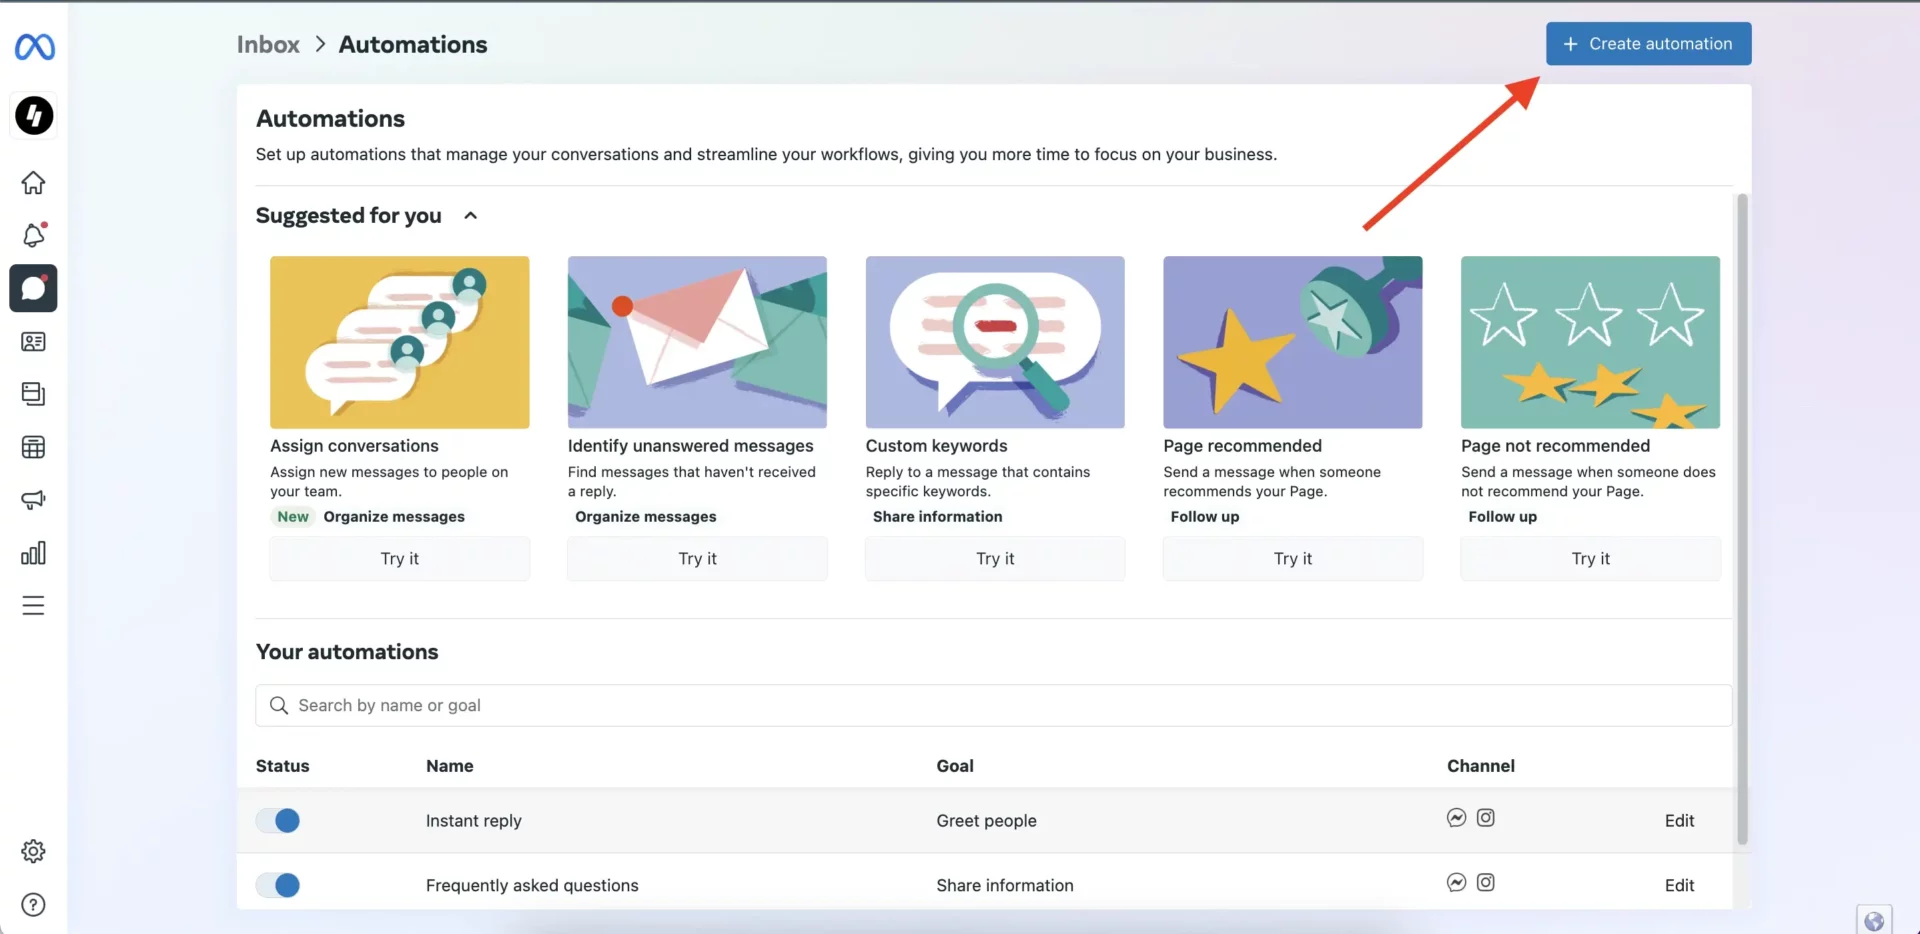
To set up Instant reply, please open your Facebook Business Suite > navigate to Inbox > select Automations
Click on Create Automation
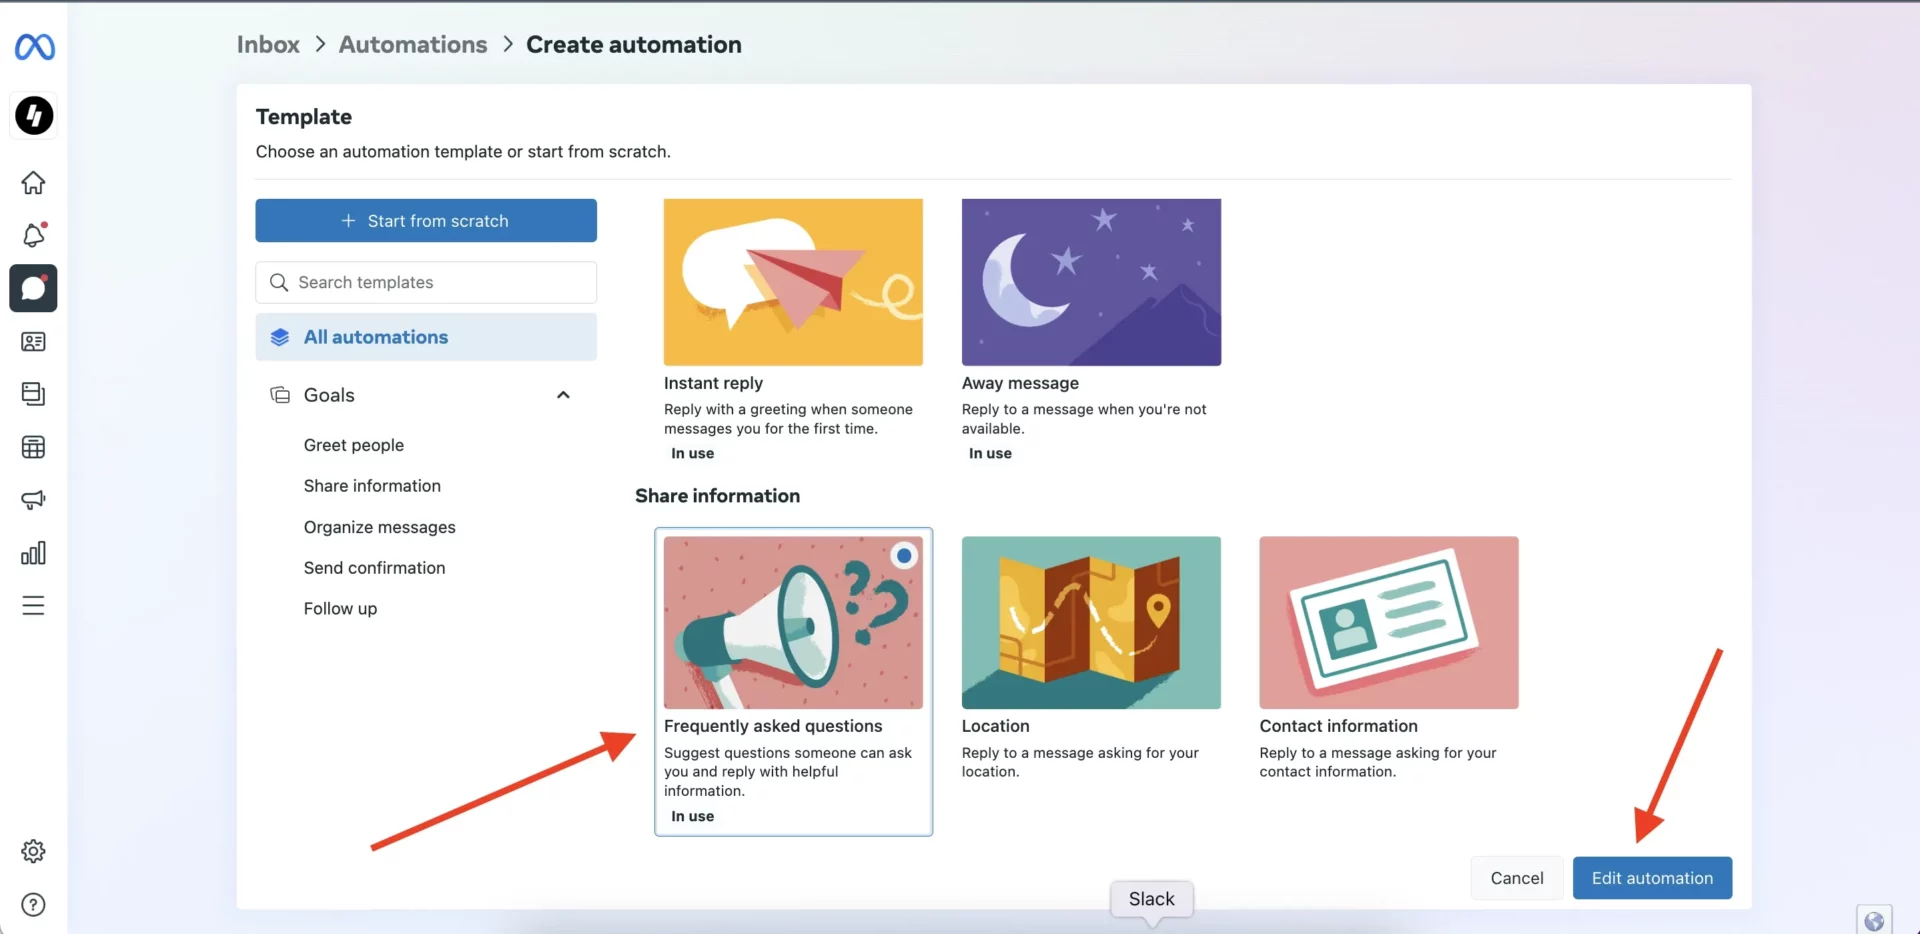
Then select Frequently Asked Questions and click Edit automation
Click on Add another question and proceed
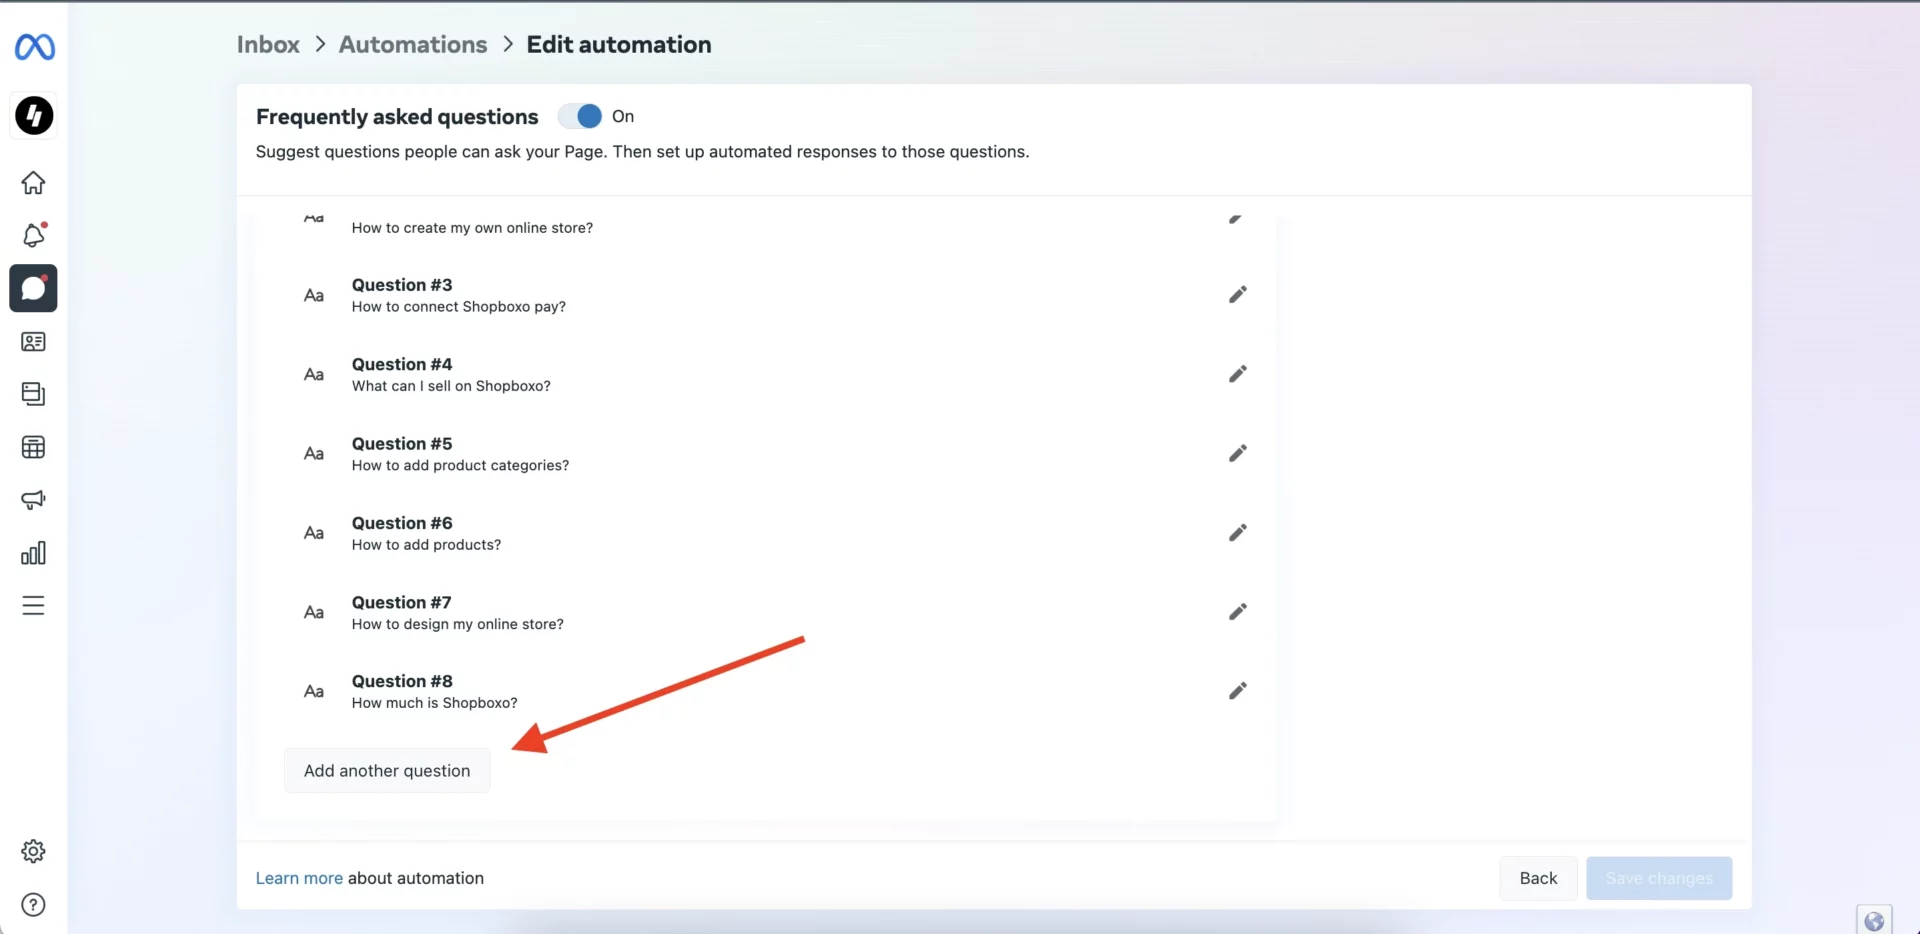
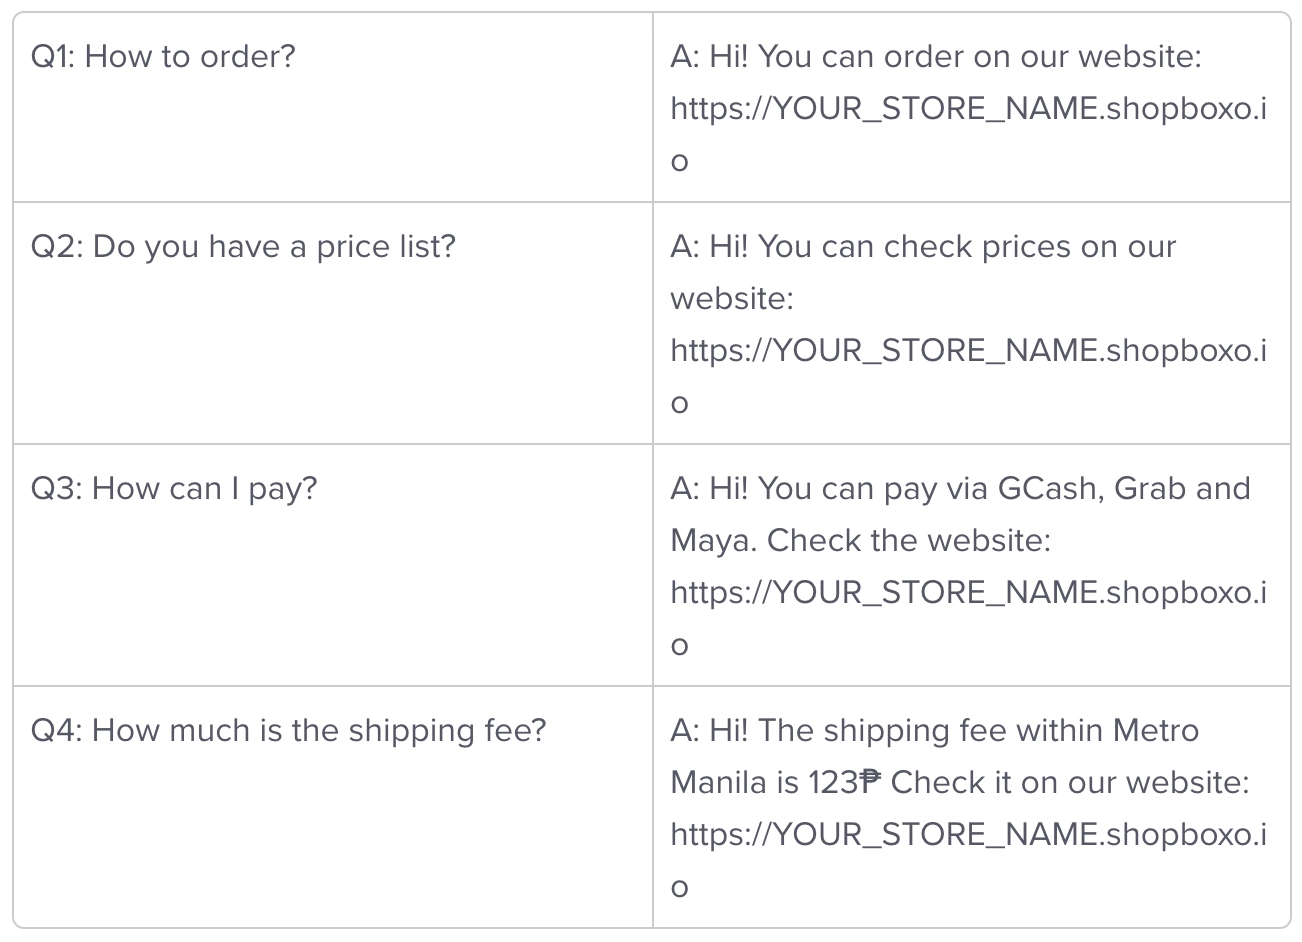
Now you need add your first question and answer for the question.
For example:
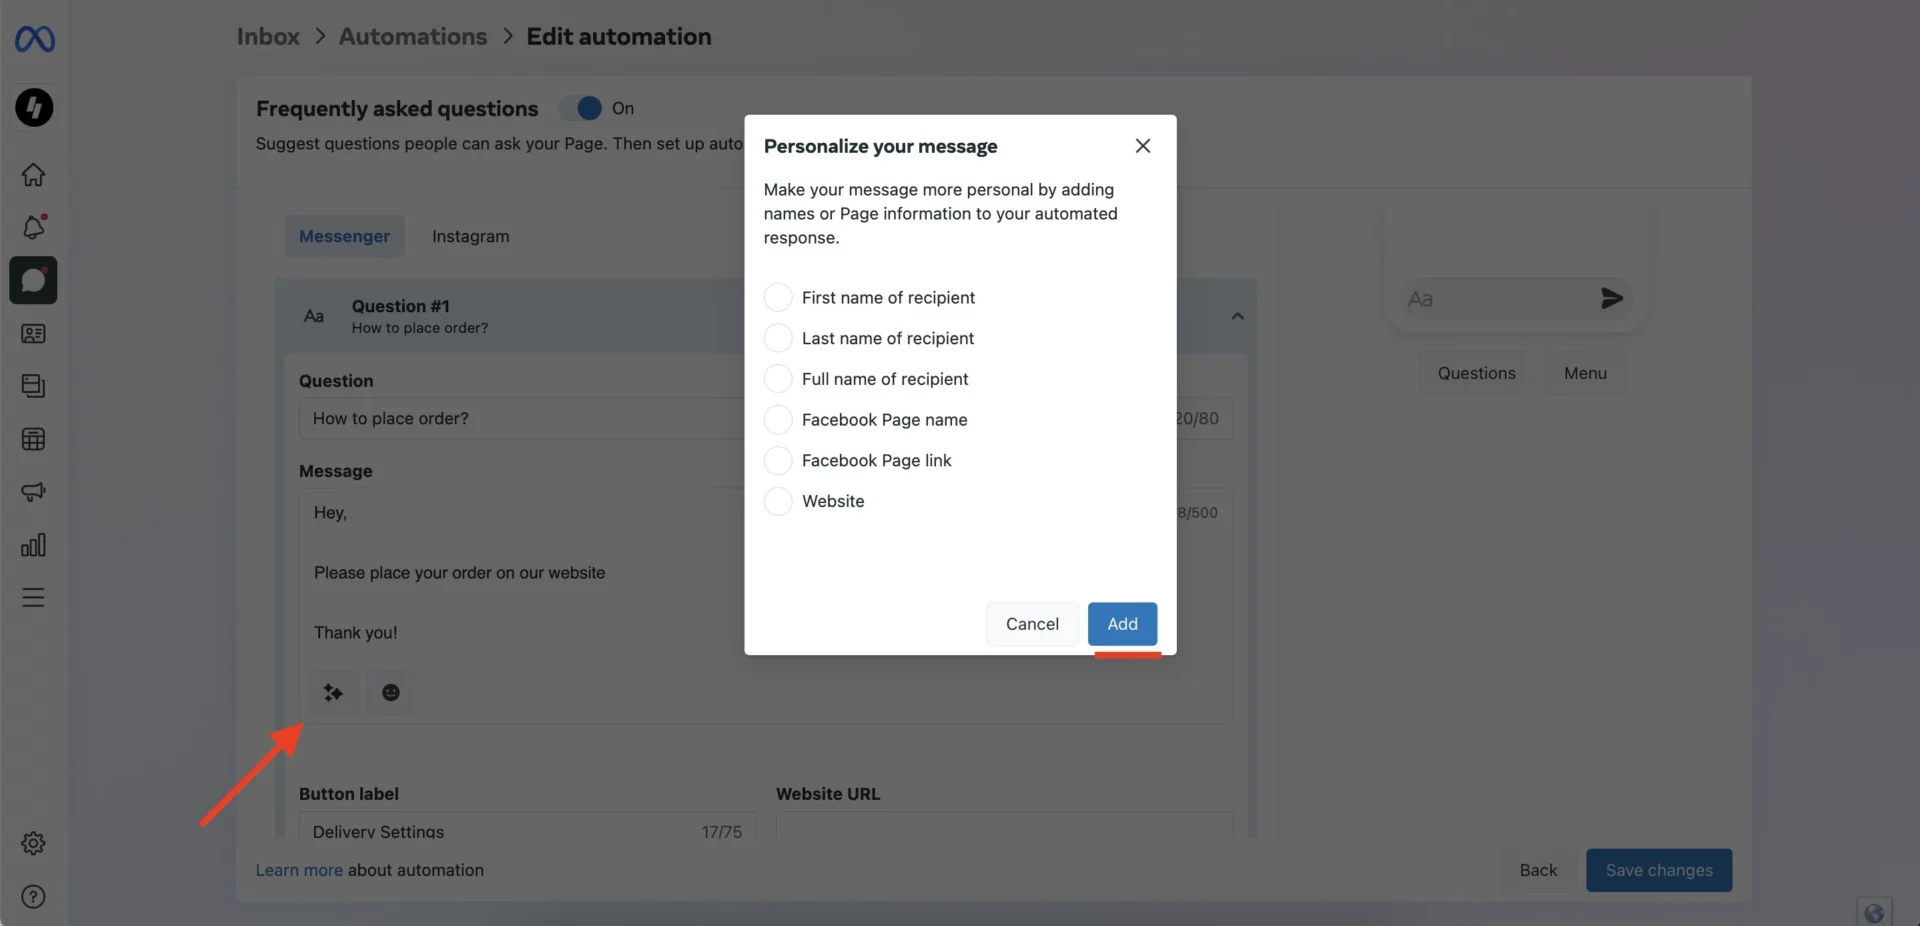
ProTip: click on this button to personalize your message. Include customer name or your website.
Add all your question options and hit Save changes
Now your Facebook page have automated responses. Just make sure the status is active.
You can also use this for your Instagram
This Facebook Messenger Automation Guide is also available in our Help Center, where you can find more guides to help you set up your online store.
Take Your E-commerce Business to the next level with Facebook Messenger Automation Integration
– Accept orders on any device
– Drag and drop functionality
– Create your custom menu
– Pre-built themes
– No coding required


